Check out these five fun Thanksgiving crafts to do with all your little ones from toddler to teen.
Turkey Mosaic
Supplies: paper plate, glue stick, construction paper, marker
Setup is super easy. All you need to do is cut your paper plate in half and take your construction paper and cut it into small pieces to use for the mosaic tiles and place in a small tray. Be sure to leave a couple of brown pieces of paper to the side.
This step can be done by older children or set up by an adult. (I do this set up for my 2 year old son to make it a little easier.) Take your brown construction paper and cut out your turkey’s body (See Pic for shape). I always freehand these, each turkey is unique! Then draw on some eyes and glue an orange triangle for a beak. Take 1 of the halved paper plates and glue your turkey body on; then you will be ready to roll.
Set the turkey, tray of mosaic pieces, and glue stick out and let your little one create a colorful turkey to display this Thanksgiving!
Picture Credit: One Crazy Mom
Indian Corn
Indian Corn is a staple at Thanksgiving and is known for it’s multicolored kernels. This interpretation is a fun and creative craft for your kids this year. Plus you can use them to decorate your table!
Supplies: 4 tan 12″ pipe cleaner and about 120 fall colored pony beads
Group your pipe cleaners in bundle with all the ends evens and twist them in the middle. Then even space out the ends into the shape of a star.
Next use about 15 beads for each row and leave close to one inch free so you can secure the beads in place later.
Once all the beads a used bend each end up and gather the points. Twist to secure the beads in place and fan out the free space on the end to make the husks.
Last place them in a bowl or at each place setting for a fun decor option on your Thanksgiving table.
Pro Tip ~ fall colors make for realistic Indian Corn, but you can let you kiddos use their creativity and come up with some exciting combinations using any color pony beads
For more step by step pictures check out: One Little Project.

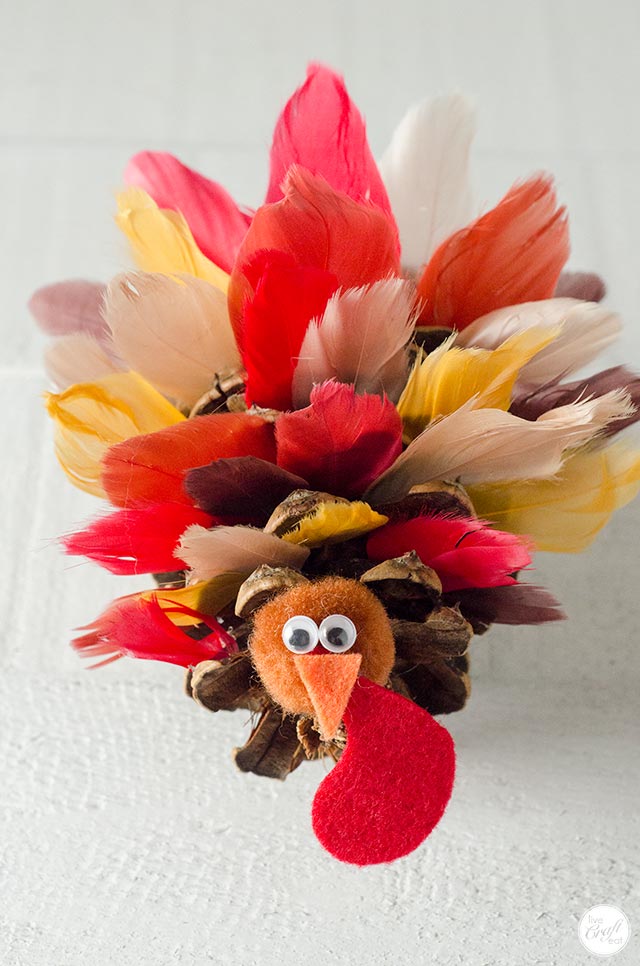
Pine Cone Turkeys
I have always loved these adorable turkeys. They are a favorite of mine to set place cards in at the Thanksgiving dinner table.
Supplies: pine cone, feathers, hot glue gun and glue sticks, googly eyes, tan pom pom, orange and red felt
First figure out which side to lay your pine cone so it lays flat and doesn’t roll. Next cut your feathers about half way down in a V shape. (See website link for picture) Then arrange your feathers between the pine cone scales varying your colors as you go.
Once you are happy with your design take one feather out at a time and put a little hot glue on the bottom and replace it. As you get closer to where the head of the turkey will go cut the feathers a little shorter so there will be a slow gradient to where you will put the face.
To make the face glue 2 googly eyes to a pom pom. Then cut a triangle out toe the orange felt for the beak and a waddle out of the red felt. Glue the waddle to the pom pom; then glue the beak to the pom pom.
Use a pair of scissors to cut the stem off the front of the pine cone, then clue the face on.
For more Step by Step Pictures Visit: Live Craft Eat.

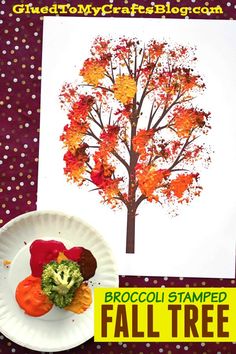
Broccoli Stamped Fall Tree
This is a fun art project that gets a little more exposure to broccoli too. Maybe it will get our kiddos to eat more of their veggies!
Supplies: fresh, raw broccoli, craft paper, paper plate, and paint
First print this free tree branch outline for the base of your tree HERE.
Next put all the paint colors you want to use on a paper plate. For Thanksgiving I prefer oranges, yellows, red, and browns.
Then use the broccoli florets as stamps until the leaves look full and/or your little one has a design the are proud of!
Pro-Tip~ If you don’t have raw broccoli, then a rolled up ball of aluminum foil is a great substitute!
*Pics and Printables found at Glued to My Crafts Blog.


Thankful Pie
This is a great craft to get kids to think about what they are thankful for this year.
Supplies: 2 paper plates, orange construction paper, brown and white paint, glue, brad, and a marker
Mix your brown and white paints until it is a color that resembles a crust and paint the rim of 1 paper plate. Cut out an orange circle from construction paper that fits the center ring of the paper plate and glue it to the one you painted earlier.
On the second paper plate section it into 6 sections write six different things you are thankful for. Then put that paper plate under the other and put the brad in the center.
On the pie center either use a marker or a stick to write “I am thankful for”. Last cut out a pie shaped section out of the orange construction paper to reveal what your little one is thankful for (be sure to avoid the brad)!
Picture Credit: Brendid.